Hi, there. I made mention a while back that I'd noticed a lot of you have begun making photo posts on your blog—LiveJournal, usually. I totally encourage this. Photography is an amazingly neat form of self-expression, and it's always neat to see you and the other things that you find interesting.
However, there are a few things that you should know about posting photos on LiveJournal.
One of the things that I've seen a lot of you using that I really appreciate is the <lj-cut> tag. If you follow these other steps and resize your images properly, don't bother with the <lj-cut>! It's your journal, and I'd certainly like to see whatever interests you enough to post there. However, while a lot of you may think you're resizing your images, you might be surprised—you aren't, necessarily!
When you use the “rich text mode” on LiveJournal and “resize” the photos that way (or, writing HTML, you use the width="" and height="" attributes in an <img> tag), the images don't get resized in the way that you might think. What that method does is set the height and width attributes of the image. This means that your friends' computers will download the whole image (which can be pretty big!) and then resize it. And the resize is pretty sloppy, too. Here's a demonstration.
Do you notice a difference? The edges in the second picture probably look a little bit jagged. That's what happens when you resize it in the browser. The first image was resized in Photoshop.
So, here are the pros and cons:
- Resize in browser
- + Less time messing with the image
- - More time downloading
- - Sloppier image quality
- Resize in image program
- - More time messing with the image (though not by much)
- + Less time downloading
- + Cleaner image quality
The only other (possible) downside that I can see is that you have to download or buy a program like Photoshop. This isn't a huge issue for me, and downloading one has been well worth it—for me, at least.
Besides Photoshop and the other buyable programs for image manipulation, there are several free ones. One of them comes with Windows—MS Paint. Another is the Gimp, which is completely free and can do most things that Photoshop can do. I'll show you how to use each of these below.
Resizing in Photoshop
To start out, open your original file in photoshop. I tend to work at the highest resolution I can, so my original is 11 MB, and 2272 x 1704 pixels.
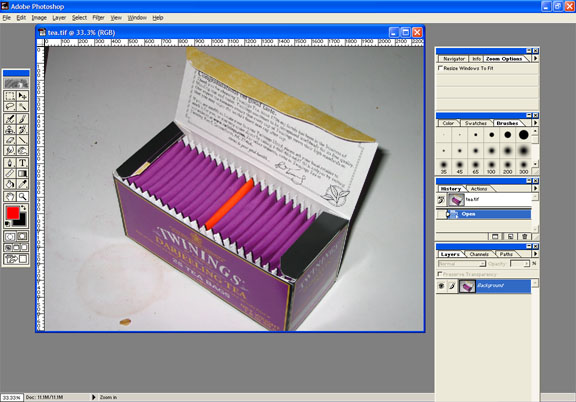
From here, select “Image Size” from the “Image” menu.
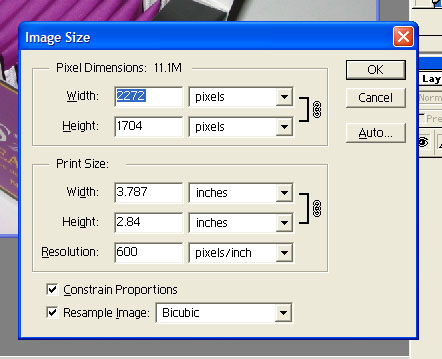
After making sure that “Constrain Proportions” is checked, I usually switch the top measurement from “pixels” to “percent’, then change it to 25% or how small I want my image to be. After that, click “Okay”.
Then, use “Save As” save it to whatever file you want it as. It's a good idea to include “thumbnail” somewhere in the title.
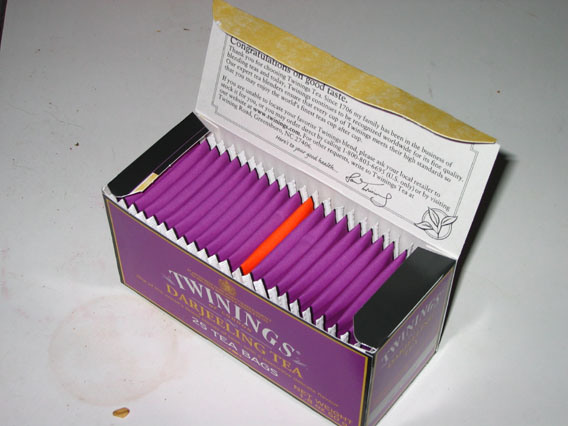
And you're done!
Resizing in MS Paint
To start out, open your original file in MS Paint. It might look a little funny because, unlike some other programs, MS Paint doesn't zoom out automatically when given a massive image.
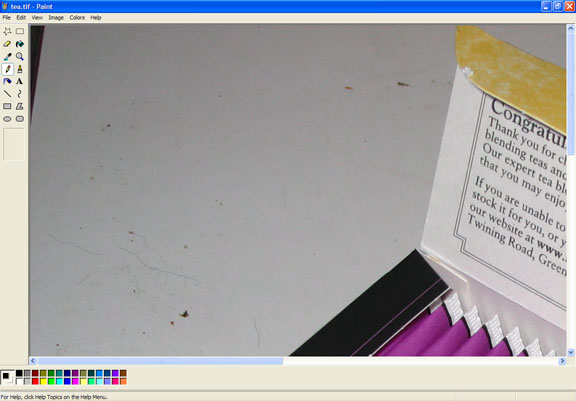
Then select “Stretch/Skew” from the “Image” menu.
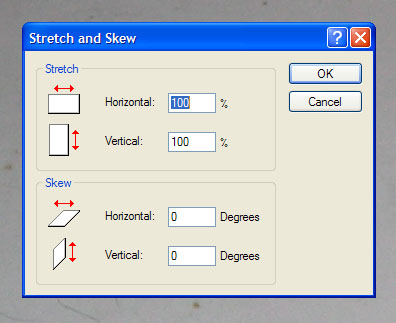
Then change both values—both values, since it's not automatic—from “100%” to “25%” or whatever percent you want your photos reduced to.
Press okay, click “Save As” to save the photo to whatever filename you want. I'd strongly suggest a title with “thumbnail” or “thumb” somewhere in it.
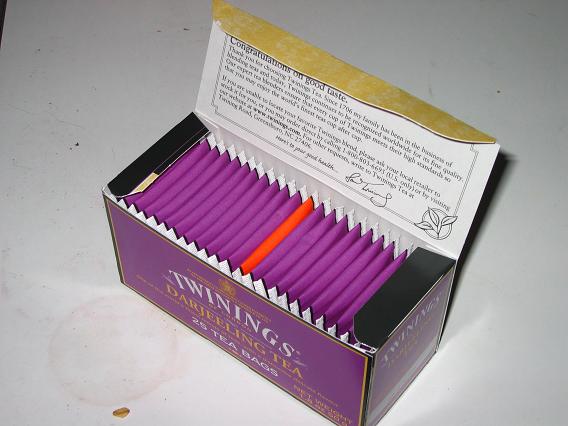
Done!
Resizing in The Gimp
The screenshots in this section will look slightly different as I haven't got the Gimp installed on Windows—only Linux.
To start out, open your original file in The Gimp.
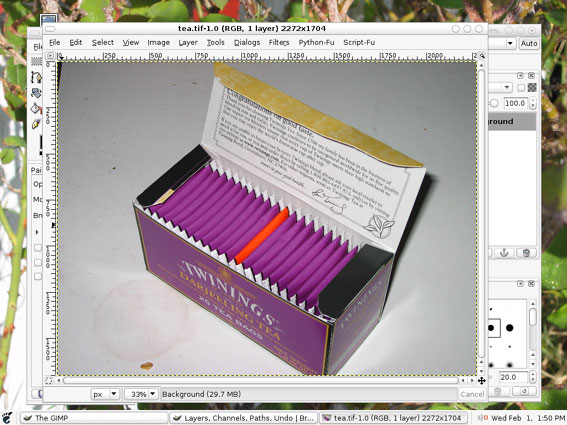
Then select “Scale Image” from the “Image” menu.
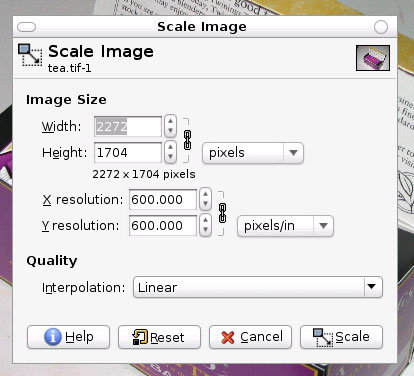
Change the measurement from “pixels” to “percent”, change the value from 100% to 25%, and click “Scale”.
Then use “Save As” to save it to a filename of your choice. I'd suggest that the filename include “thumbnail” or “thumb”.
And you're done!